They say we never get a second chance to make a first impression. When it comes to real estate photography, this statement appears to be especially true. Any experienced landlord or real estate professional would agree that photos can either make or break your property listing. High-quality pictures can make a world of difference to your entire rental experience. Believe it or not, but the right illustrations can generate 139% more clicks on your listing.
While there is no shortage of articles on real estate photography, the world runs short of tried and tested recommendations on this topic. I decided to challenge the status quo and solve the problem once and for all. Keep reading to learn the best practices of real estate photography.
Why quality photos matter?
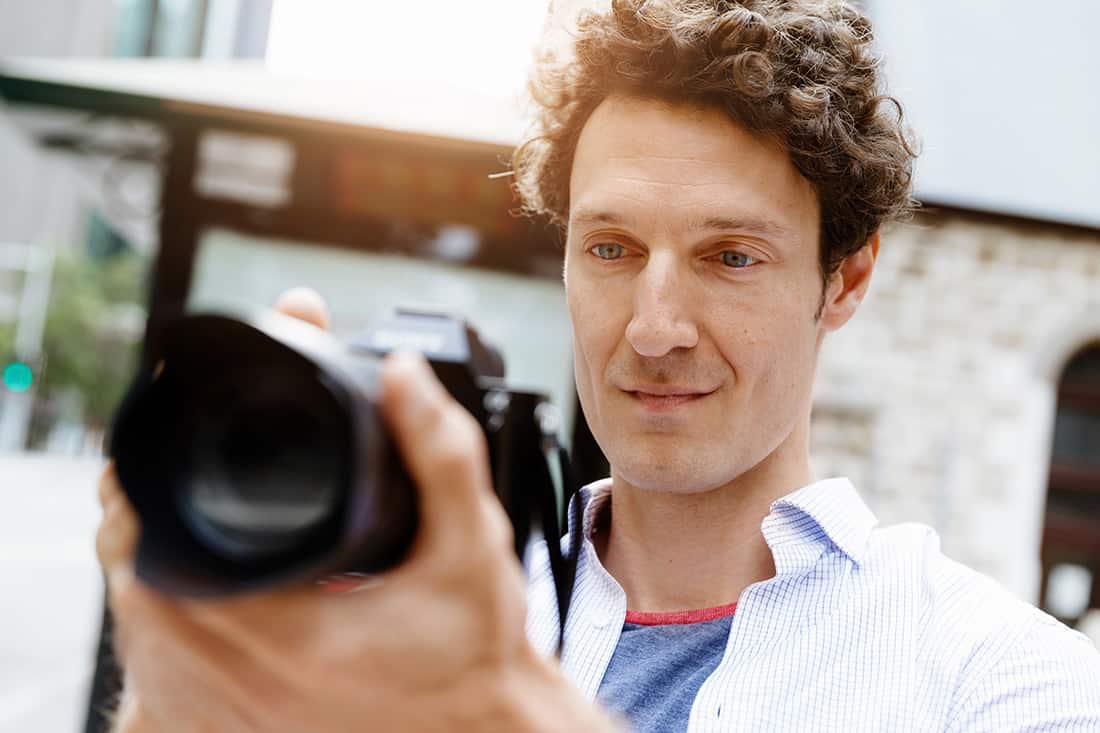
Meet Alex Kotovskov, a professional photographer and a product designer at Rentberry. Almost every day, Alex looks through dozens of property listings and sorts out the most successful ones. We asked Alex about the importance of quality photos, and here’s what he said:
I believe in the paramount importance of emotional factor. When looking for a long-term rent, people search for a place that will feel like home. Quality photos help people imagine their future life in a new place. This emotional trigger makes them send applications. What’s more, the majority of tenants scan photos first, and read property descriptions only in case they find pictures good enough. In other words, adding quality photos is the best way to make listings stand out in the highly competitive market.
With this in mind, I created this comprehensive guide to help you take the first steps on the road of real estate photography.
Get the right equipment
It all comes down to four things – camera, lens, tripod, and flash.
Camera. The good news is that you do not need to spend a fortune on your camera body. Compared to other photography niches, real estate photography is slightly less demanding on the camera. The only thing you should be concerned about is an excellent ISO performance. High ISO is crucial for night shooting, and you should not miss a chance to show your property lit up.
Lenses. Professionals recommend using wide-angle lenses. They make small spaces look bigger and also help emphasize the sense of depth. There are no strict requirements, but be geared toward 10-22mm and 12-24mm for cropped sensor cameras, and 16-35mm for full-frame ones.
Tripod. Unless you live on a planet with permanent daylight and perfectly illuminated properties, using a tripod is an absolute must. Not only will this help you take crisp photos in low light situations, but it will also let you conduct a late-night photo shoot. When you take pictures with a long exposure, the proper stability of your camera is absolutely necessary.
Flash. When it comes to flash, all people fall into two camps: those who avoid using flash at all cost and those who believe that flash is the most crucial tool in real estate photography. What both camps seem to agree upon is that a regular DSLR’s flash can’t do the job. If you decide to use flash for your real estate shooting, you’d better think of an off-camera flash and wireless triggers.
If your goal is to create a stellar property listing, you should consider taking pictures of an exterior with a camera drone. You might think that it is way too much, but the truth is that differentiating property listings with such images pays enormous dividends. If you are looking for the latest marketing weapon in the real estate industry, photos made with camera drones might be just that.
Know what to capture
If you want to create a truly outstanding property listing, you need to make sure it looks complete and answers all questions your prospective tenants may have. With this in mind, remember to capture the following areas:
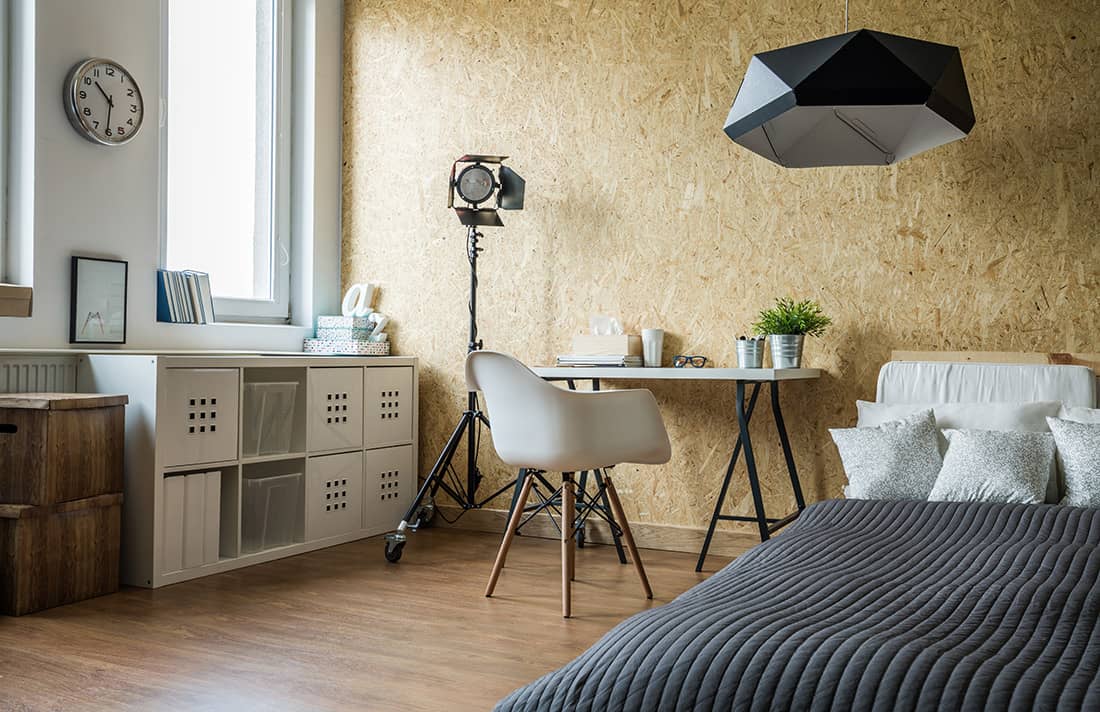
Living room. Make sure it looks relaxing and homelike. Spend some time to find the best angle for your shot at making the room look as spacious as possible.
Bedroom. Try to make it look cozy and bright. It is always a good idea to highlight some perks, such as a stunning view.
Kitchen and dining area. Before shooting, ensure there is no trace of household cleaning products. Your primary goal is to make this room look tidy and functional.
Bathroom. Since the bathroom is usually the smallest room, you need to find the right corner for your shoot. It might be a challenge, but it is worth it.
Exterior. Schedule your shooting for a time that will let you benefit from the natural light. Sunlight and sunset hours are the best for outdoor shootings.
Play with camera settings
Most photography experts would agree that all comes down to light. Just like there are no two properties with the same amount of lightning, there is no perfect choice for camera settings. Sadly, the one-size-fits-all approach is not the case with photography.
To make quality pictures, you need to become adept at capturing light. To make this happen, you should get familiar with the idea of the exposure triangle, which consists of shutter speed, an aperture, and an ISO.

Shutter speed. Depending on the amount of natural light, experts advise setting a shutter speed between 1/60 and ½ a second.
Hint for a newbie: Basically, shutter speed is the amount of time a camera shutter remains open for exposing light into the camera sensor.
Aperture. Once again, there is no perfect choice, but most real estate photographers agree upon keeping an aperture between F8 and F11.
Hint for a newbie: Aperture determines how wide a lens is open when you take a picture.
ISO. Just like in any other photography niche, the principle of using ISO is simple: keep it as low as possible unless your goal is a picture full of noise and grain. Experts suggest going no higher than 400.
Hint for a newbie: ISO is used to determine how sensitive our camera sensor is to the source of light.
Take advantage of retouching
No matter how good your shot is, there is always room for improvement. It is safe to say that taking pictures is only half the process. To make images truly eye-catching, a reasonable amount of retouch is necessary. Before you get lost in the variety of software available on the market, you need to understand that your goal is to make pictures appealing while keeping them natural-looking.
There is a fair bit of software available, but if you want to save your time, feel free to rely on our choice. I suggest using Adobe Photoshop Lightroom or Photos for desktop, and VSCO or Snapseed for mobile.
There are many things you can do to your photos, but don’t get frustrated and focus on the following tasks:
Vertical correction is probably one of the most important things to do. All vertical lines must be vertical; this is an absolute must. Otherwise, the walls will look unstable, and the whole picture will scream unprofessional.
HDR adjustment. The chances are that the majority of photos will have areas with bright windows and the areas with dark corners. HDR treatment can help brighten up the darker parts of the picture without causing a negative effect on the well-lit parts.
Proper cropping. Feel free to crop unwanted sections from your pictures. You should always capture more than you think you need; this will give you more space for post-processing.
White balance settings. Although the best approach is to adjust a white balance on your camera in the first place, you can also tweak it to your taste later. Make sure the final version of your picture looks natural. Photos that look either too cold or too warm are not what you need.
Make sure to avoid common mistakes
They say the devil is in the details, so you should never underestimate the importance of minor issues. Given this, I came up with a list of the most common mistakes amateur real estate photographers tend to make.
- Avoid that weird reflection of a flash; this screams unprofessional, you should avoid it at all costs.
- Make sure your lenses are clean. Sorry for the hint at an obvious, but you have no idea how many people overlook this one.
- Clear up clutter. Chaotic photos do not sell, so make sure to get rid of unnecessary stuff before starting to shoot.
- Don’t go heavy on retouch. Remember that less is more. No one likes it when photos look unnatural.
- No children or pets. They work just great for Christmas commercials, but real estate photography is an entirely different matter.
- Try to capture the whole room instead of focusing on specific items located in this room.
Or hire a professional photographer
Although real estate photography is not a rocket science, it takes the effort to achieve the desired result. If you don’t feel like the idea of spending your time on mastering photography skills, it might be smart to refer for professional help.
Unless you live on Mars, there are plenty of real estate photographers available virtually everywhere. While it is better to hire someone specialized in real estate photography, a general photographer might do the job just well. The average price for a real estate photographer is $160, but the sum may vary depending on the location and project details. Experience shows that professional real estate photos have a high return on investment, so this spending is worth it.
Real estate photography checklist
It might be hard to keep in mind all the things written above, so I composed a shortlist to help you memorize the most critical points.
- Get the right equipment: a camera with a wide lens, a tripod, and an off-camera flash.
- Adjust your camera settings: keep shutter speed between 1/60 and ½ a second, aperture between F8 and F11, and ISO under 400.
- Capture all important areas: living room, bedroom, kitchen and dining area, bathroom, and exterior.
- Retouch photos paying particular attention to vertical correction, HDR, cropping, and white balance.
- Avoid the most common mistakes that scream amateur.
Arm yourself with a camera and get your property the pictures it deserves. Keep in mind that quality photos will skyrocket your chances to rent out faster and for a better price.
Real Estate Photographers Blogs
If you want additional advice and guidance, check out the following real estate photographers’ blogs. They would give you an excellent example of professional photos, some tricks of the craft, and certainly plenty of inspiration.
Scott Hargis
This blog is not just an advertisement venue; it is a masterpiece. Scott Hargis has a passion for architecture and photography. That is why he goes into the intricate details of each case he has ever encountered. What time of day is best to shoot a high-tech apartment? What camera-angle should you choose when shooting a colonial mansion? What is the difference in perception of light in European and Asian interiors? That is not the full list of elaborate topics you can encounter on his blog.
Best Real Estate Photographers
The website provides a comprehensive directory of the best photographers in the game. You can pick your country and region and see if any high-profile photographer operates in your area. Go through the galleries of photos and review the best practices in this craft. The website’s blog covers the vast array of topics, including styles and techniques of real estate photography. It features advice from media and sales experts on how to market your property, what image to convey to the public, and how to pick the right photographer.
AntisPhotography
Unusual blog about real estate photography, instead of offering you tips on shooting your apartment it provides a thorough analysis of the role of photos in real estate. The website analyzes marketing trends, new methods, and tools available for the landlords. Have you considered making a video of your property or crafting a 3D model? What aspects do you need to consider when shooting with the drone? Answers to those intriguing questions you can find here.
Jordan Photography
An excellent blog that is practical, witty, and straightforward. It focuses on the main question, how to effectively advertise your property. This blog answer the most mundane questions you might have: how many photos should I take? Should I hire a professional photographer?
Virtuance
The website gives an interesting perspective on Real Estate photography; it mainly focuses not on how to shoot, but how to showcase your apartment. The photo of your property should not merely depict the rooms and furniture; it has to tell the story. The blog explains how to create an atmosphere, paint a picture of the cozy place where everybody wants to reside.
Thanks for this guide! I’m preparing for my first real estate shoot tomorrow and already took some screenshots to remember what you’ve said. 🙂
Thank you for all this great information about photography. I really like that you say to make sure that you have some wide angle lenses. That way, you will be able to get the best photo of everything you need to show off your house.
FYI, the first blog this article links too has the wrong name. It’s Scott Hargis, you chopped off the last letter of his last name.
Thank you Lan, fixed.
This is very an interesting and informative post for all. I am very thankful for this kind of post. Thanks for sharing this.
Great read!!
Professional photos will really help a lot in the success of one’s business. Thank you for this informative article.
Great article! As a fellow real estate photographer, I agree with all of these tips.
You are so right about getting the right equipment, it worked great when we tried.